Just like Friends (A TV show), which continued winning the hearts of people over the years, CS 1.6 or Condition Zero (commonly known as Counter-Strike) stands no exception when it comes to the gaming world. It all started with the Half-Life series when Valve released it back in 1998. Then they went on with the counter-strike series and continued gaining popularity till the date. What made this game outstanding was its ability to let people play online or locally with their friends. To this day, players go crazy when they plan to play Counter-Strike with their friends.
The real problem arises when people are at different locations and try to create a server and connect themselves. In this case, the obvious choice is to join over the Internet. But since everybody has a different ISP and IP subnets, it becomes difficult to get all of them on board compared to the local area network.
I used to face challenges playing CS 1.6 with my friends online by creating my server. In the end, I would give up and join the public servers. Later, when I could successfully make my server over the internet, I got so happy. I wanted these methods to get known by every Counter-strike player who is still sailing in the same boat as I was.
So, here are the two ways to host your counter-strike server over the internet.

Pre-Requisites
- You should have one of these game versions of Counter-Strike on your PC.
- Counter-Strike 1.6 (Standard CS 1.6)
- Counter-Strike – Condition Zero
- Half-Life Dedicated Server (HLDS) installed along with the game.
- There are two methods to host the CS 1.6 dedicated server. Each one has its requirement.
- The first method requires a virtual private network (VPN) application installed on the host and peer computers. Here, the host PC is the one hosting the game and, peers are players who would be joining. In this guide, we will use the powerful and free VPN Hamachi for the demonstration. The software is compatible with popular operating systems like Windows (except Server OS), Mac, and Linux.
- The second method requires you to have a router that would support the Port forwarding functionality.
Host Counter-Strike CS 1.6 / Condition Zero Server on Windows PC
As discussed earlier, we will be demonstrating two ways to achieve the results.
Method 1 – Using LogMeIn Hamachi VPN
Hamachi is a free VPN tool with which you can create your private networks and surf the web using a VPN tunnel. Now, this is how it works – being a server PC owner, you create a private network with whatever name you want. You ask your friends to join that network using the ID and password (if any). Once connected to your network, you all share a private network and, the rest of things would work similarly to how it’s supposed to work on LAN. Let’s get to the steps for creating a dedicated CS 1.6 server on your PC.
Step 1 – Download LogMeIn Hamachi from vpn.net

Step 2 – Install Hamachi on your Windows PC. Once the installation completes, Hamachi shall create a network adapter that you can check by opening the Network and sharing center.

Step 3 – For Windows 7 users, if you don’t see the Hamachi adapter installed or can’t get it working no matter what you do, then no worries, we have got you covered. Just download Windows update KB3033929 and re-install the hamachi.
Step 4 – Open hamachi and turn on the VPN if it’s not already. Once that’s done, then on the top side, you should see your VPN IP.

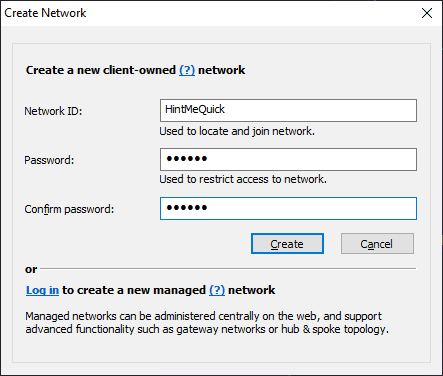
Step 5 – Create a new network and assign it a name and a password.
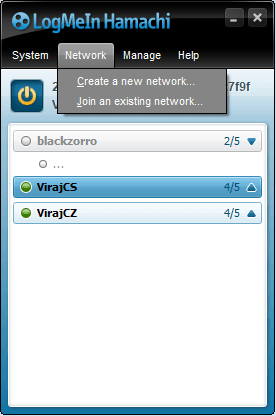
Step 6 – Hamachi will ask you to sign in or sign up if you are not a member. Once that is completed, you can create your client-owned network.
Step 7 – Ask your friends to install Hamachi and follow Steps 1 to 6. Once you all have Hamachi installed, tell them to join the network you created earlier by providing Network ID and Password. Upon joining your network, their PC name would be visible under the network along with the green dot.
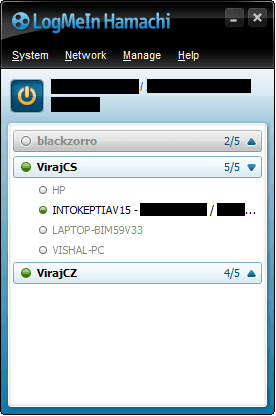
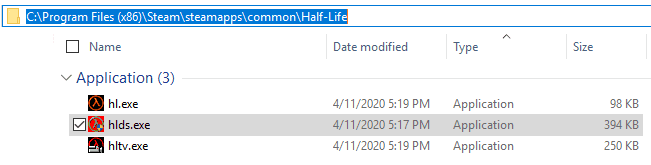
Note – there is a limitation on the number of peers connecting to a single network. As you can see in the image above, Network VirajCS has five members. That is the max limit for a free LogMeIn account. But no reason to get sad! You can overcome that limitation by creating multiple networks and adding your friends to those networks. Step 8 – Assuming that all your friends connect to your network, ask them to copy your IP address located near the power button on the top of the hamachi UI. Your friends would need this IP to connect to your CS 1.6 server. Step 9 – Run the CS 1.6 Dedicated Server or Half-life dedicated server.exe file. Generally located on this path – C:\Program Files (x86)\Steam\steamapps\common\Half-Life. Your game directory could be different depending on the path you chose while installing CS 1.6 or a standalone HLDS server.
Step 10 – While starting the server, select Network mode as Internet if you want to use a steam client and LAN if it’s a non-steam client. Keep the default port number 27015.
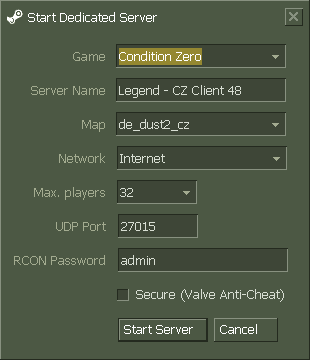
Step 11 – Once the server starts, you should see the hamachi IP as your server IP. If it’s not the case, then either the Hamachi client is not running, powered on, or there could be some issue with the network adapter. That’s all you need to do on a server-side.

Step 12 – Ask your friends to launch CS 1.6 / Condition Zero and press the console key ~ (usually located below the Esc key). Type this command in the console and hit enter. Replace 25.XX.YY.XX with your Hamachi IP address.
Connect 25.XX.YY.XX:27015
If your friends get this error – LAN Games Restricted to Class C Clients while connecting, then, in that case, change the network type to LAN if set to the Internet earlier and vice versa.
And there you go, fellas! Now, get that sniper and beat the hell out of your opponent. Happy fragging!
Method 2 – Router Port Forwarding
Port forwarding or virtual server is yet another old-school yet effective method to host CS 1.6 dedicated server. If a server PC has high hardware configuration and fast internet connectivity, port forwarding is a way to go. The reason is that you can play online with your friends with very low latencies. Port forwarding allows remote computers to connect to a specific computer or service within a private local area network (LAN). For a faster connection, some peer-to-peer applications (such as BitTorrent) may also require that you set the port forwarding setting. Let’s not get into that now. We will have a separate guide on that sometime later.
As mentioned in the Pre-requisites, you should have a router that supports port forwarding functionality.
Step 1 – Open the router configuration page by hitting http://192.168.1.1. The address could be different for your router, depending upon the manufacturer. You can visit portforward.com and select your router model to know the exact IP address for accessing router settings.
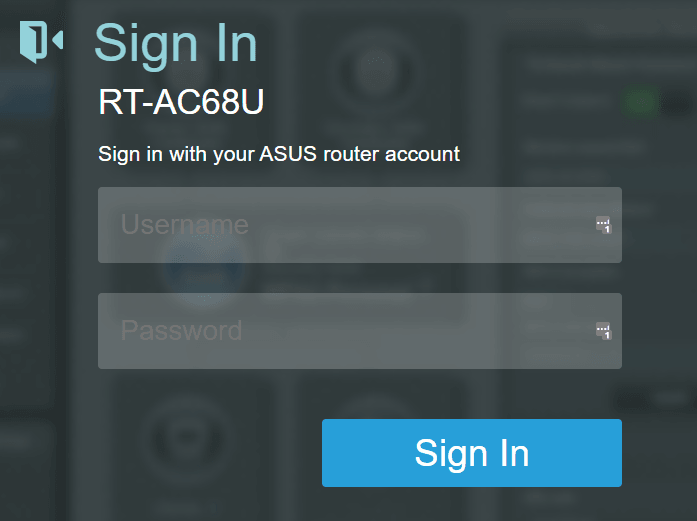
Enter the default username and password if you haven’t changed it before. In this case, I am using the ASUS RT-AC68U router, for which the default username is admin and password is password. You can find default credentials for your router on portforward.com.
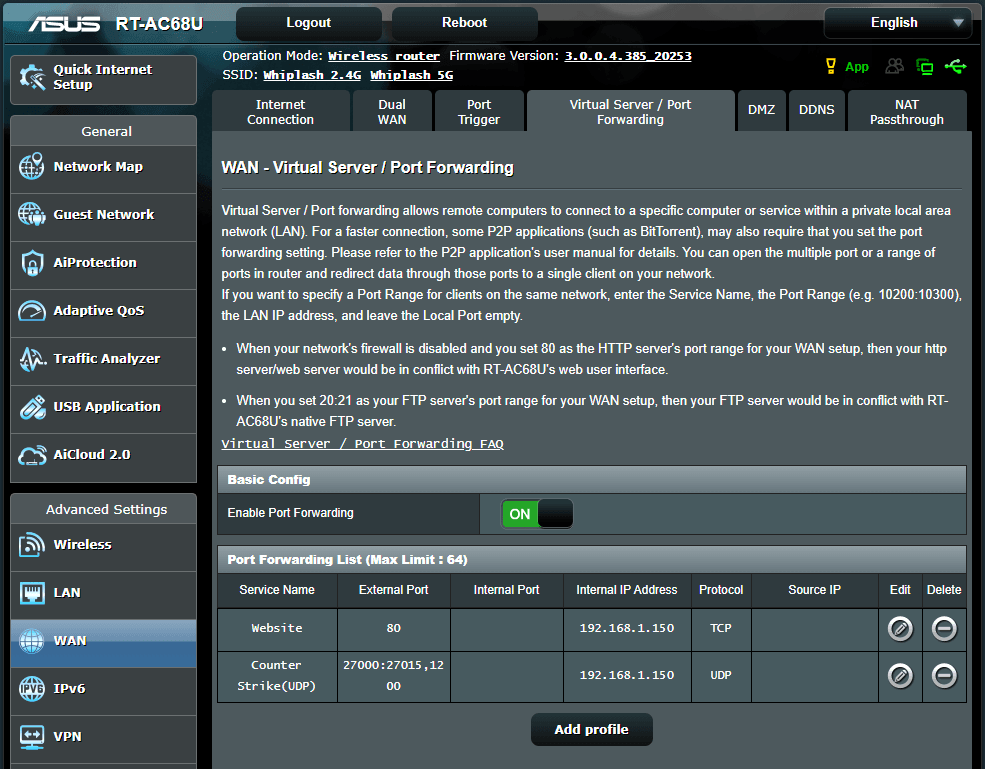
Step 2 – Find the port forwarding settings. In my case, it’s under WAN –> Virtual Server / Port Forwarding.
Step 3 – Add a port forwarding profile as below. Find a setting called external port or similar and enter 27015 or whatever port you want to use for running the Counter-Strike server. You can use port numbers from 27000 to 27015. Select protocol as UDP.
While entering the internal IP, you’ll have to enter your local area network IP assigned by the router. If you don’t know how to find the internal IP address, please go through this guide. Once you enter the internal IP, save the profile you just created and reboot the router for settings to take effect.
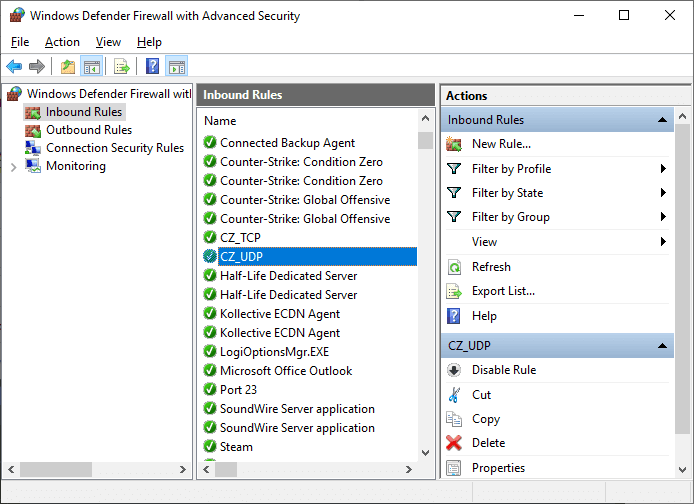
Step 4 – Add a UDP port 27015 (or whatever port you have assigned in router port forwarding settings) in Windows firewall inbound and outbound rules. You can refer to this guide for the same.
Step 5 – To check if you have successfully opened the port. Go to any UDP port checking the website, and enter your public IP address and port number you want to assess.
Note – Port forwarding only works if your router’s WAN IP matches your public IP. If your home router is behind any other router, then the port forwarding needs to be configured on the primary router.
Step 6 – Launch Counter-Strike CS 1.6 dedicated server with port 27015 (or the one you have set under router port forwarding settings in Step 3).
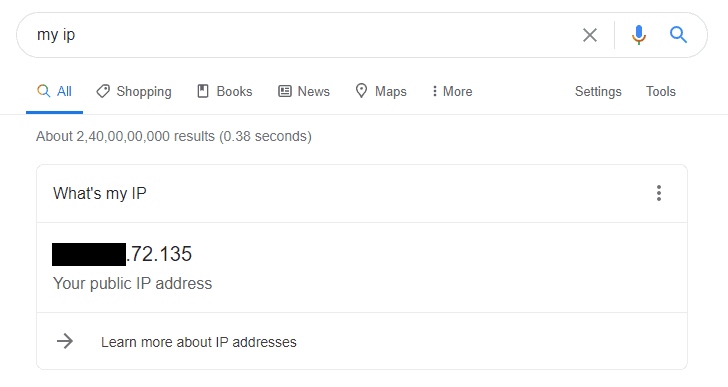
Step 7 – Once the server starts, you will see an internal IP in the Main tab. We won’t be using this IP since it is limited to the local area network only. Thus, we would use a public IP assigned by your ISP. To get that, search “my IP” on Google, and that’s the IP you have to give your friends.
Step 8 – Finally, provide the IP to your friends in the following format. Replace XX with your public IP.
connect XXX.YYYY.XXX.YYY:27015
Step 9 – Ask your friends to launch CS 1.6 / Counter-Strike / Condition Zero on their PC and open the console by typing ~ (usually located below the Esc button). Type the command mentioned in Step 8, and they are good to go.
Note – If you want to run the game and server on the same PC, that might not work by default. Counter strike game and server both share the same Port number viz, 27015. Try assigning different ports for the server, and you can play the game on the same system.
Hurrah! I hope that was quick and easy. Do let me know in the comments if you face any issues while following the guide. I’ll be glad to help you out. Cheers!