Since Samsung is constantly making security-related changes to its devices, finding loopholes has become difficult. It was hard to exploit Galaxy S7’s security, even for a famous developer like Chainfire. But after a month, he finally found the way out.
But why do you think these developers try to achieve root access? For fun, you say? Well, that’s correct! But apart from that, there are a lot more advantages.
When you root your Android phone, you get access to core system files, and then you are free to modify them as per your needs. Many incredible apps are out there which require root access. And once you grant them what they need, the real fun begins. I’ll suggest some must-have root apps at the end of this article.
One more exciting thing is that – after rooting Galaxy S7, you can even customize your device’s whole system (both functionality and UI-wise) by applying Custom recoveries and ROMs.
Mind you, even if rooting your Galaxy S7 looks exciting, it has some downfalls as well. Like, as soon as you root the phone, its warranty will get voided permanently. Secondly, the KNOX counter will become one, and you can’t use Samsung pay hereafter. This is again related to the KNOX security and warranty of your device. Think twice before attempting and understanding what you are doing. You have been warned!
Before We Proceed
This guide is only applicable for specific variants of Galaxy S7 / S7 Edge. If you can’t find your device model number below, then please don’t proceed.
Samsung Galaxy S7 Variants
Galaxy S7 SM-G930F
Galaxy S7 SM-G930T
Samsung Galaxy S7 Edge Variants
Galaxy S7 SM-G935F
- Ensure that your device’s battery is sufficiently charged. Say above 30%.
- In case if anything goes wrong, make a backup of important data before moving to the actual procedure.
Procedure to Root Galaxy S7
The rooting procedure mentioned in this guide is not at all complex and will hardly take 5 minutes of your time if followed correctly.
So let’s begin, shall we?
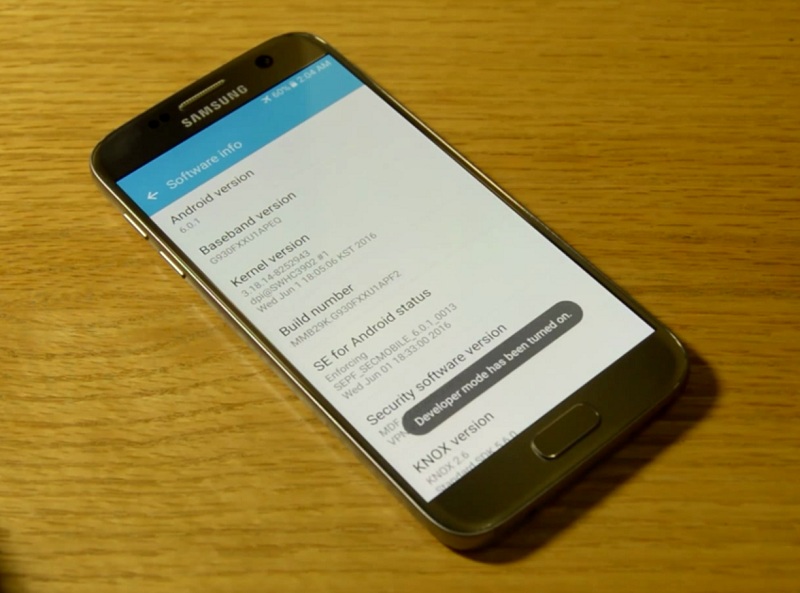
Step 1 – Go to Settings –> About device. Check for your device’s model number and make sure that it matches any of the variants that I have mentioned above.
Step 2 – Now press on Software info and tap five times on Build number until it says Developer mode has been turned on.
Step 3 – Go to Settings. You’ll see that an additional setting named Developer options is added at the end of the Settings menu. Press on that.
In Developer options, look for OEM unlock option and turn it on.

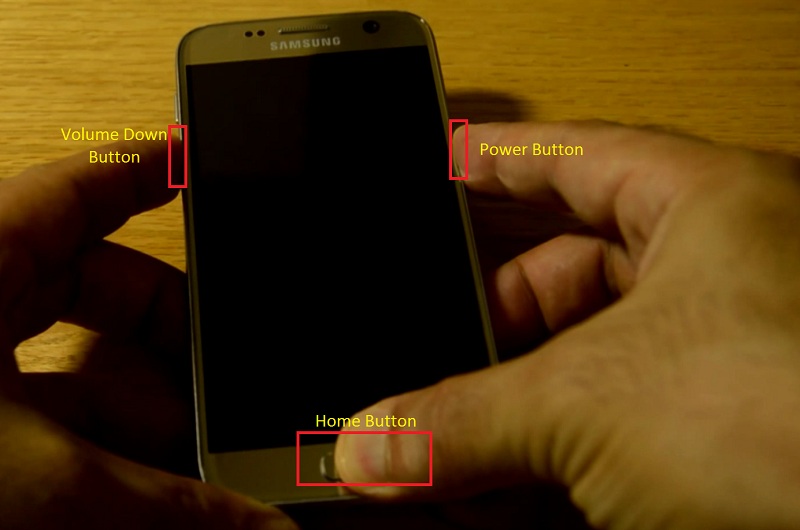
Step 4 – Switch off the phone by using the power menu. Once it’s off, press and hold Volume down + Home button + Power button simultaneously, and you’ll get download menu options with a warning sign below that. Press the Volume up button to continue.
Step 5 – Connect the phone to a Windows computer using a USB cable.
Step 6 – Download an appropriate CF-Auto-Root package as per your device’s model number.
Samsung Galaxy S7 Variants
Galaxy S7 SM-G930F
Galaxy S7 SM-G930T
Samsung Galaxy S7 Edge Variants
Galaxy S7 SM-G935F
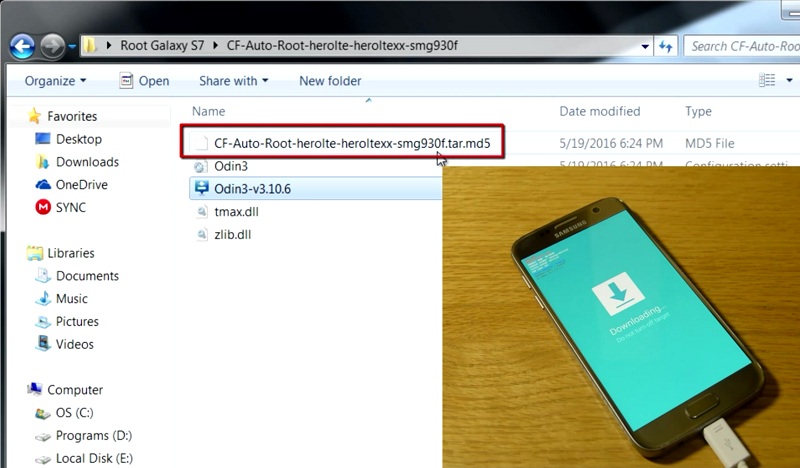
Step 7 – On a computer, extract the CF-Root package to get flashing software Odin and rooting package itself. Again, make sure that the rooting file which you have obtained after extracting contains the name of your device’s model number. In this demonstration, I am using Galaxy S7 Edge SM-G935F (international variant), and thus the package name is CF-Auto-Root-hero2lte-hero2ltexx-smg935f.tar.md5
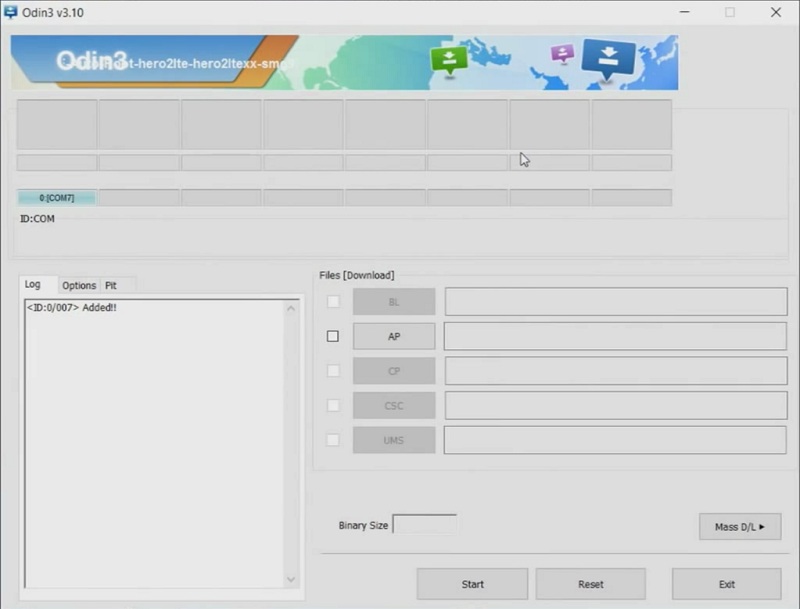
Step 8 – Run Odin software as an administrator.
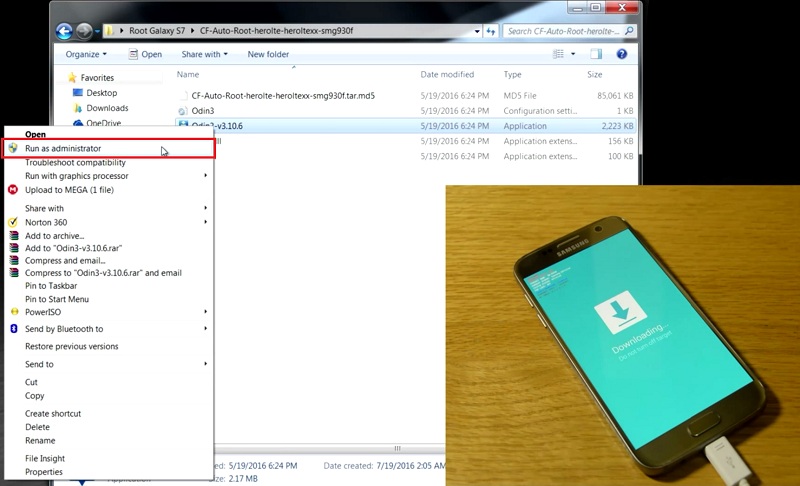
If your device is connected correctly, you’ll notice that the upper left section in Odin has turned blue. If it doesn’t, then you might need to install device drivers. You can download them from here – Samsung Galaxy S7 / S7 Edge Windows Drivers.
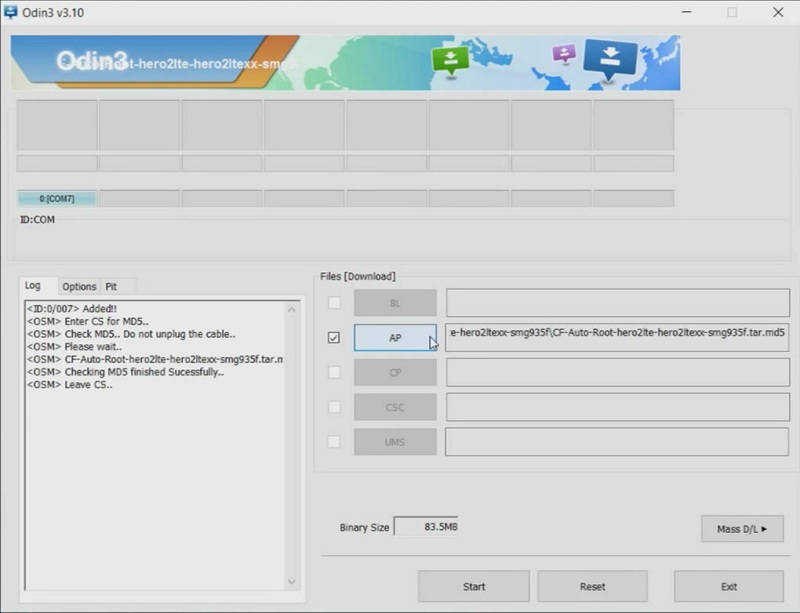
Step 9 – In Odin, click on the AP button and browse for the rooting package.
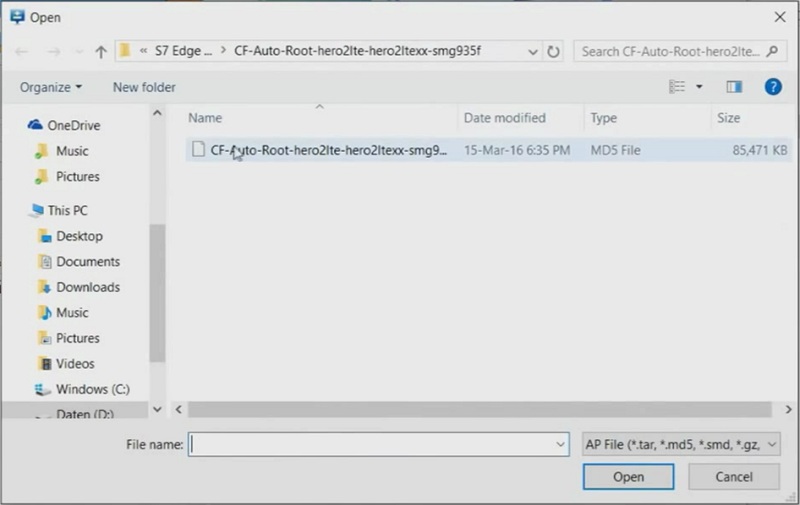
Once you do that, Odin automatically checks for md5 sum to ensure that the file you are flashing is not corrupted.
Step 10 – Finally, click on the Start button and let Odin do its magic! Do not detach the device until you get Pass the message.
Step 11 – After the device restarts, you will notice that an app called ‘‘SuperSU’’ is installed and present in the app drawer. To check if your phone is rooted or not, download the Root Checker app from Google Play Store.

Open the Root Checker app, tap on the Verify Root Status button. And no wonder it will say, “Congratulations! Root access is properly installed on this device.”

And that’s it, guys! You’ve successfully opened gates to a fantastic world of customizations by rooting your Galaxy S7 smartphone. Do let me know if you face any difficulty while following this guide, and I will be glad to help you out.
Oh, by the way, here are some apps that you can try with your rooted Galaxy S7.
- Titanium Backup
- Greenify
- Root Firewall
- Adblock Plus
- Dumpster
- Viper4Android (Highly recommended for audiophiles).
- Tasker (for phone automation).